A Before and After Tour of Our Home (Part 1) + Exciting News!


Today I’m sharing part one of a long overdue before and after tour of our home, plus some very exciting news! I’m going to share before and after photos of all the spaces in our home along with my thought process on the renovations we’ve completed in the past three years.

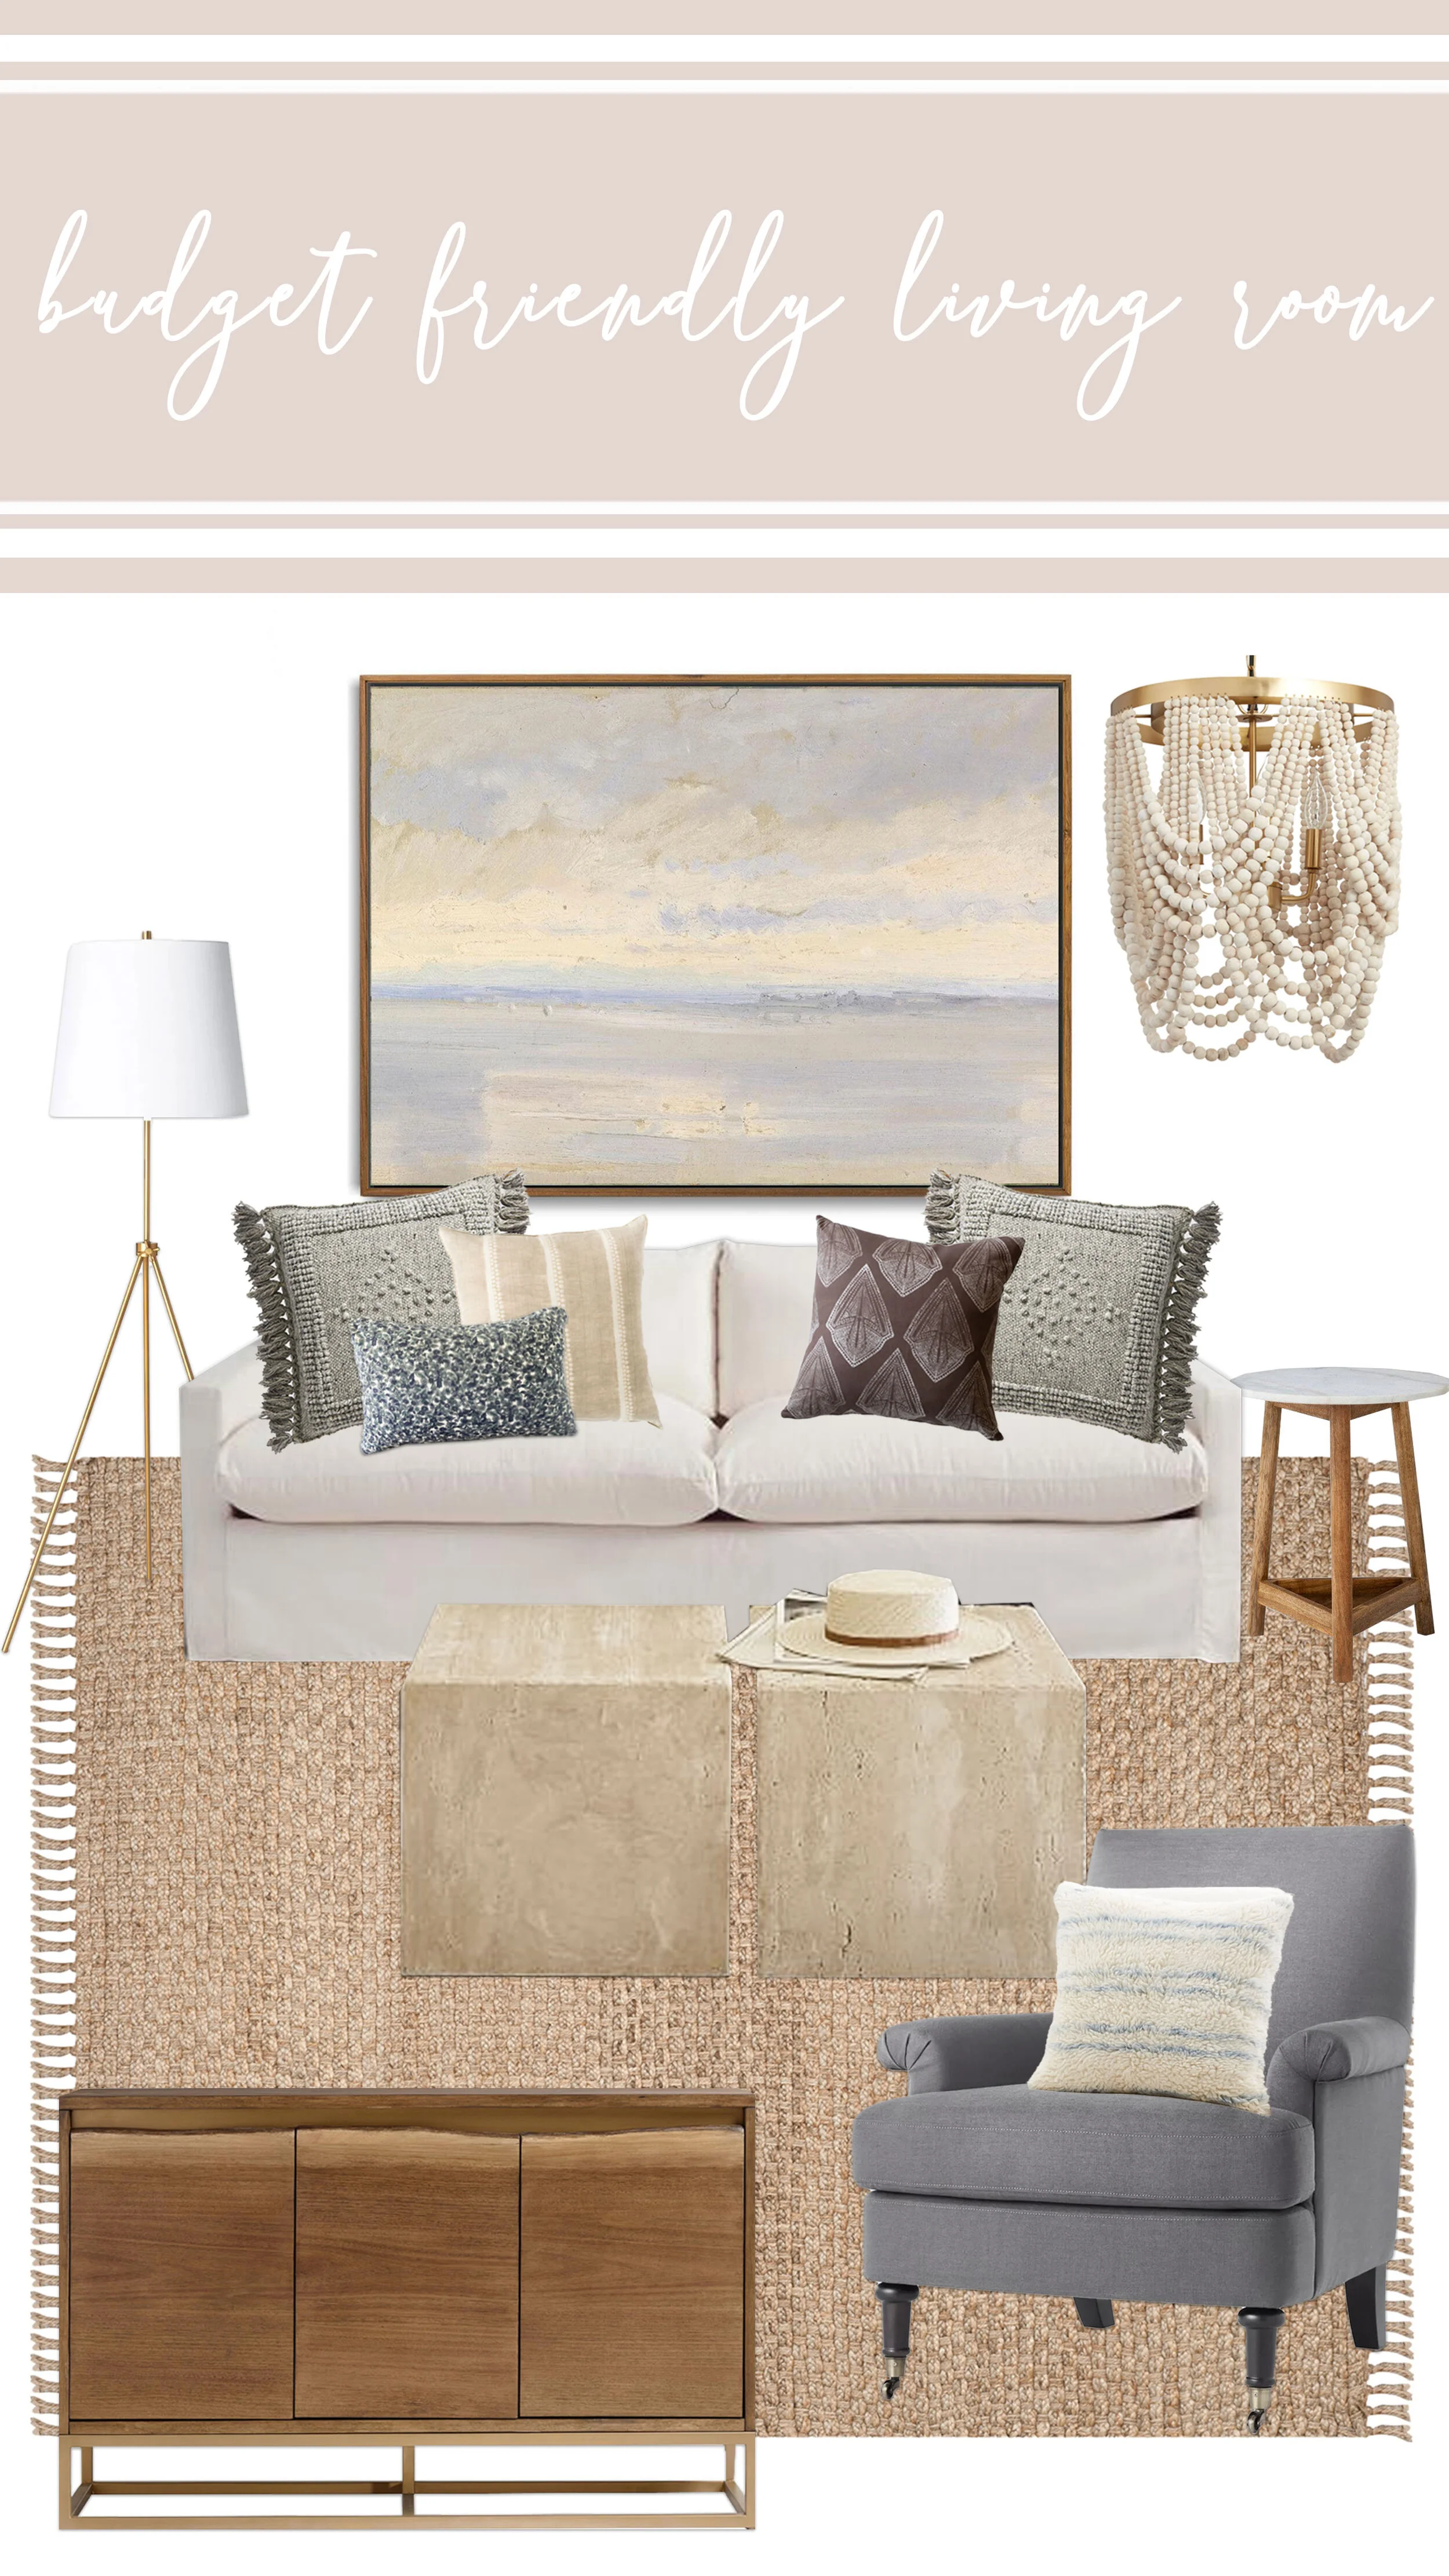
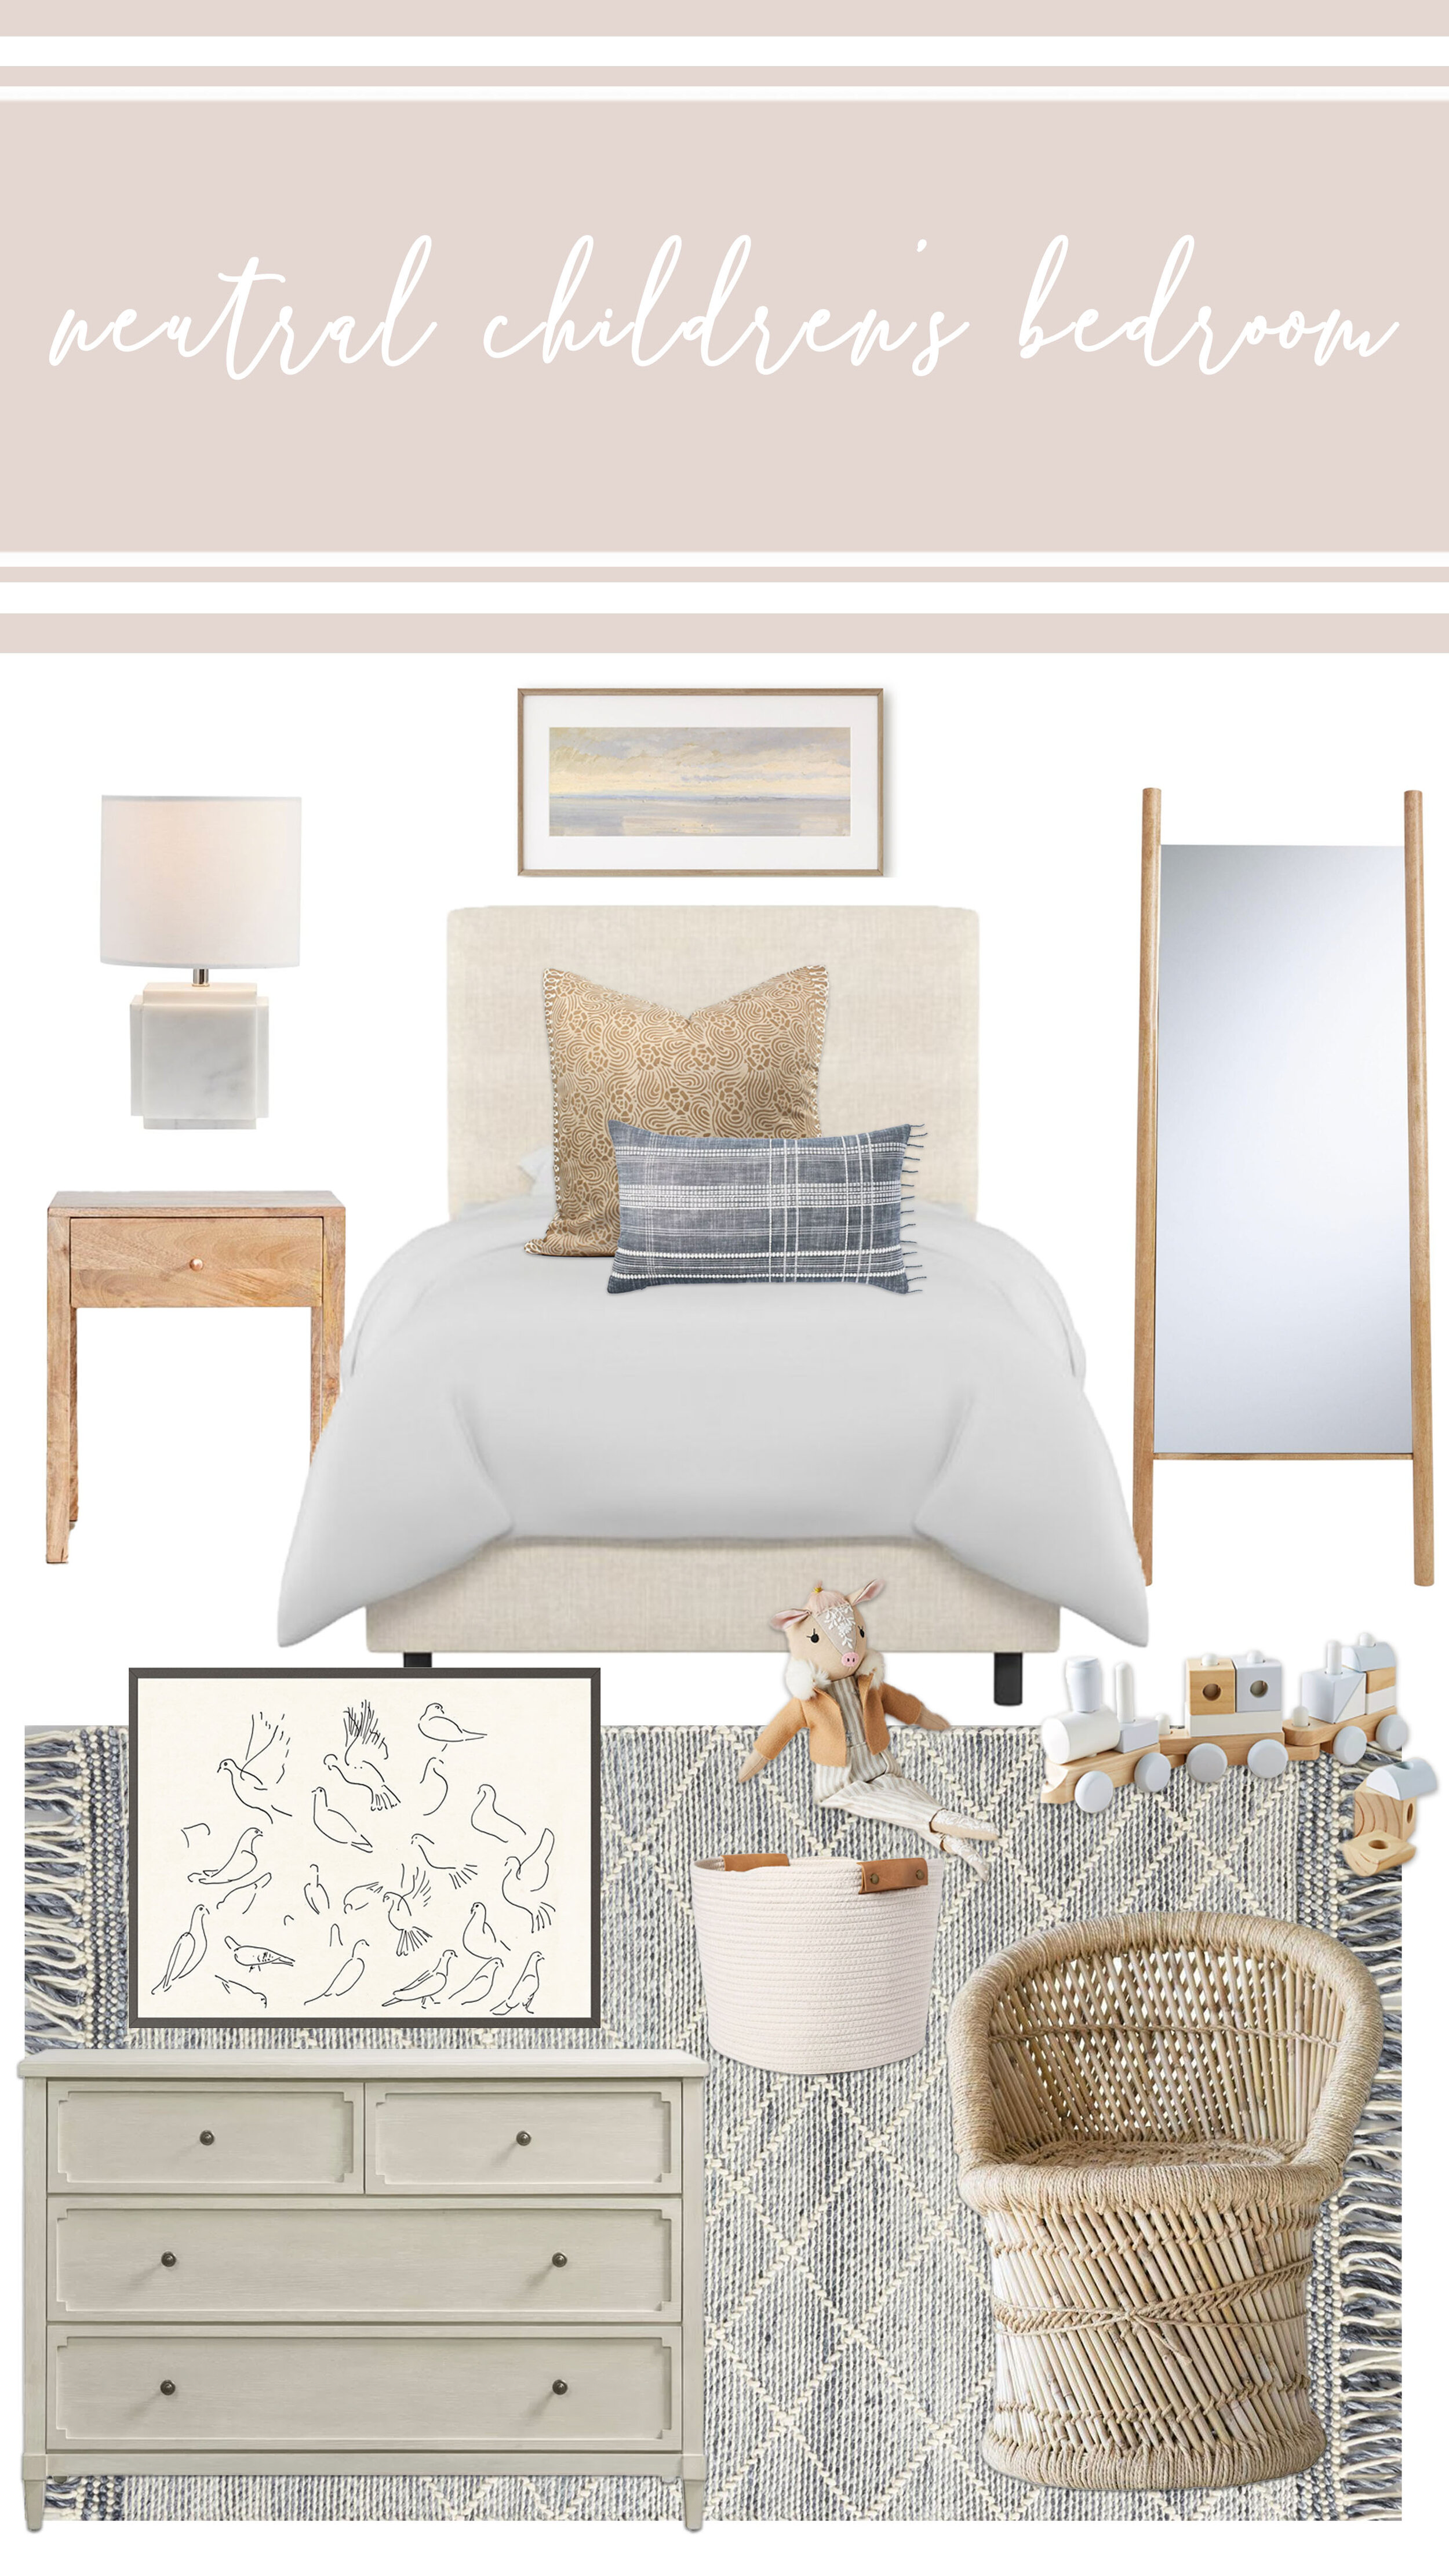
But first for my exciting news—I’m so happy to announce that starting today I’ll be offering E-Design services! I’ve been an E-Designer for many years, and have been wanting to start offering this service to you all for a long time, so I’m thrilled to be able to do so now! If you’re looking for more information on the services I offer and would like to know a little more about what to expect from the design process, please head to the E-Design Services tab, and check out the packages and the FAQ page. I look forward to working with those of you who are interested!

IMG_2912.JPG

Now, onto the before and after tour! We purchased this home three years ago, and it was a total cosmetic fixer upper. It was built in 1981, and was in good shape structurally, but cosmetically it was in need of a lot attention, which was exactly what we were looking for!

We took out all the existing flooring in the home and replaced it with Johnson Hardwood British Isles Series in Essex, and painted the entire house in Sherwin Williams Extra White. You can see the difference the brighter and softer color palette makes in our entryway.

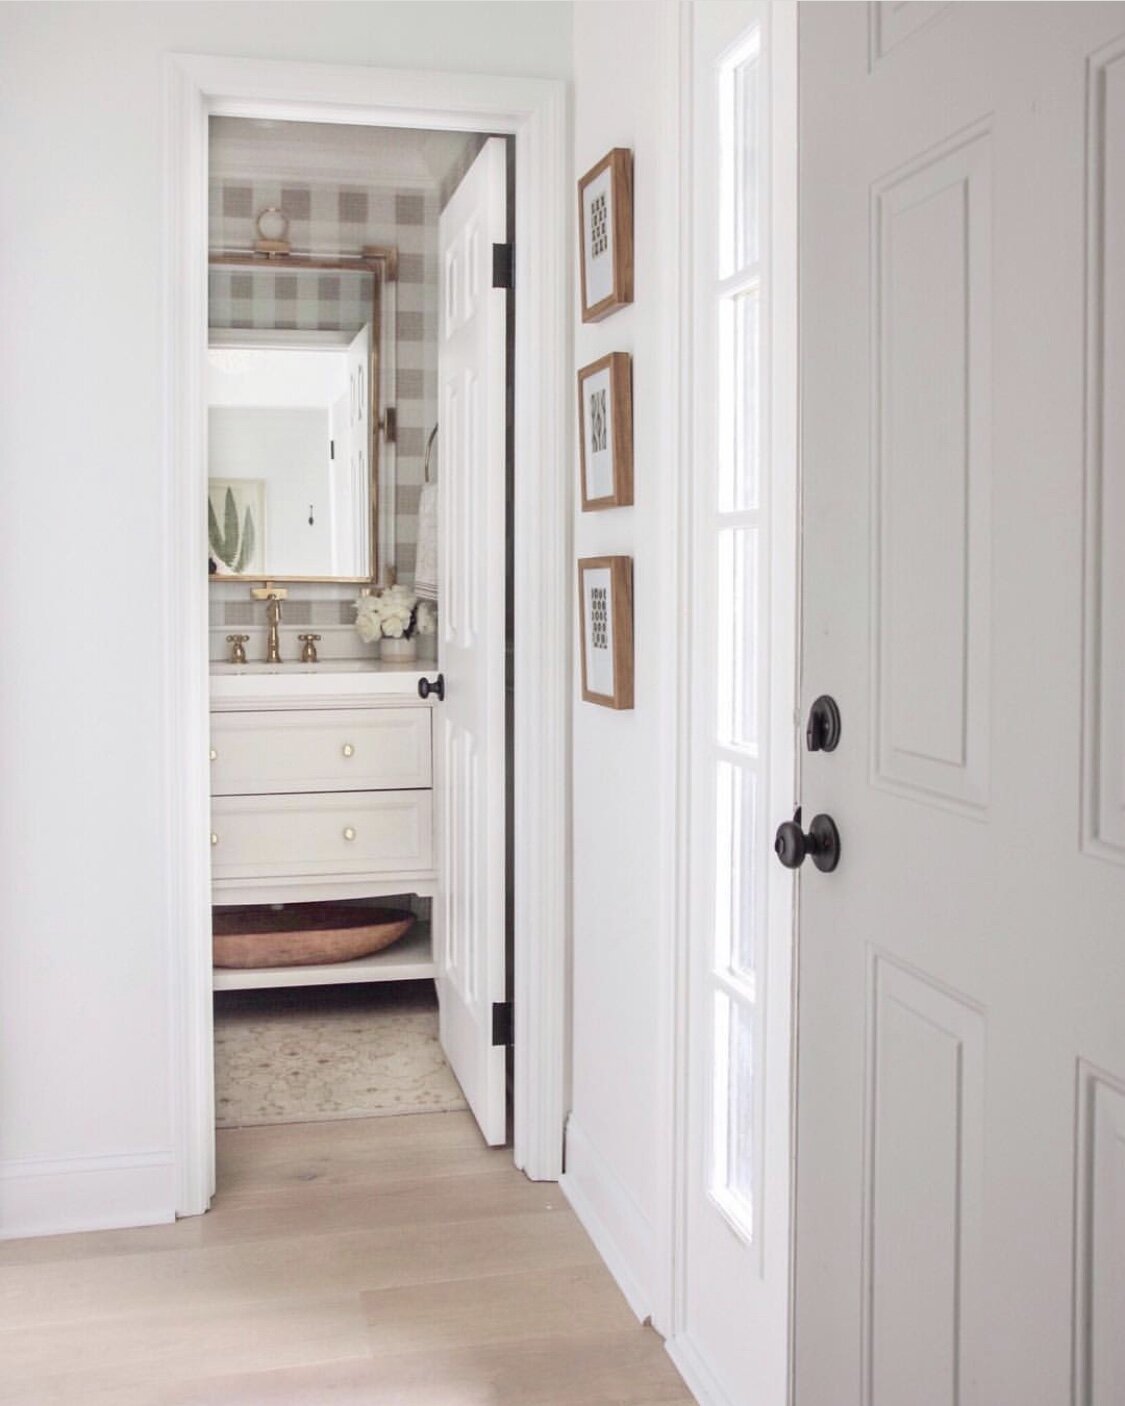
We made some more major changes to our powder room, moving the toilet from an awkward spot next to the door to the back wall. We also added in some wainscoting and wallpaper to add more architectural interest to the space.

IMG_8893.jpg

Next up is our kitchen, which we have only made small changes to until we could afford to do a complete renovation. We were planning to do the full renovation this year, but we had to put that on hold for now. Since I knew we’d be keeping this kitchen for a while longer I did add in some floating shelves which we’ve been enjoying a lot! Before we moved in we gave all the cabinets a fresh coat of white paint and new hardware. We also put in new appliances, a farm sink and faucet, and covered the existing laminate countertops with a faux marble countertop film to make it more cohesive with the other renovations in our home.

In our dining room we added a shiplap accent wall to pull in some dimension to the space, and replaced the track lighting with a beaded chandelier. Another huge change we made to the home was to replace all the windows and patio door to black Anderson Windows with grilles. The old windows were original to the home, and were very leaky. The slider door was not the right size, and we battled a waterfall inside every time it rained for almost a year after we bought the home!

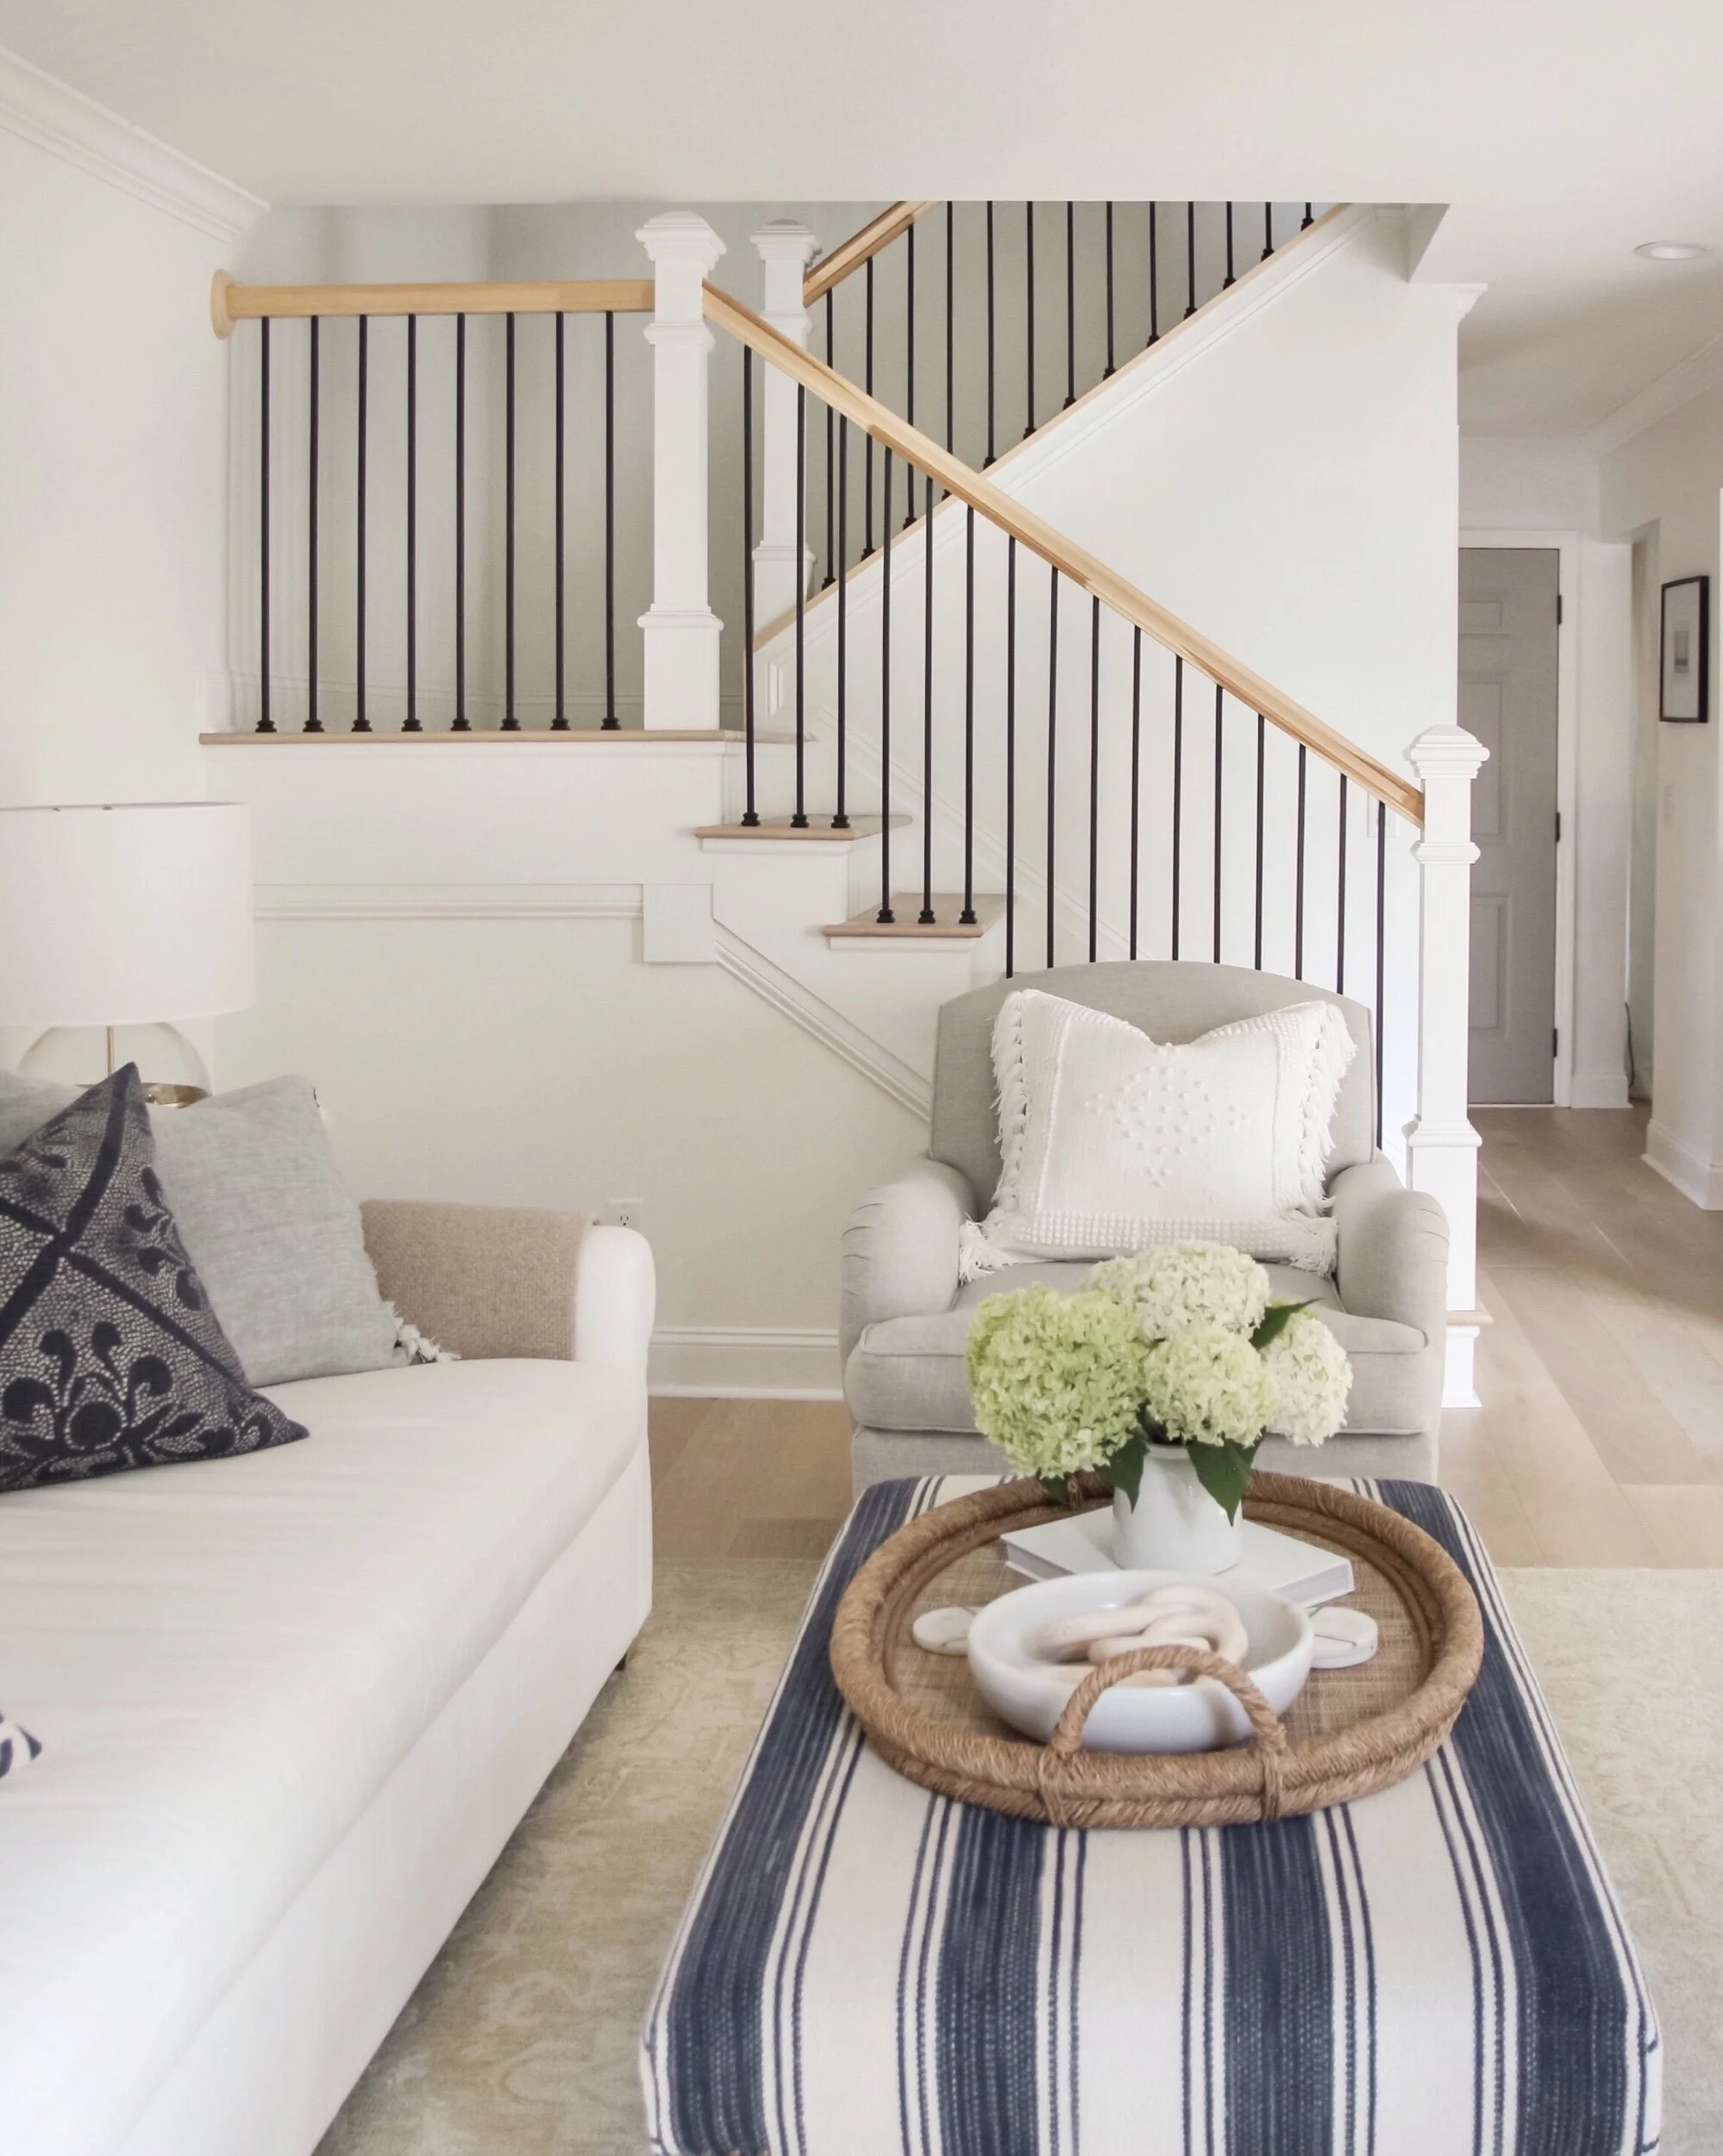
Our living room was another big transformation in the home, as we updated the fireplace with a shiplap wall treatment and a marble surround. We also remodeled the staircase by carrying our wood flooring through on the treads, adding wrought iron spindles, and removing the half wall on the upper portion of the staircase. The white paint was a welcomed change from the dark paint colors that were there before.

IMG_8870 copy.jpg
IMG_3419.JPG

Lastly, we head to the backyard. We’ve kept the deck for now, but added in some additional landscaping and created a seating area on the upper level and a small dining area on the lower level. We love spending time in this space, and try to work at the dining table in the mornings as much as possible!

IMG_1943.JPG

I hope you all enjoyed part one of the tour! Stay tuned for the second floor of our home in part two!


Weekend Style: Kids Hangout Room

 
IMG_4008.JPG

For today’s weekend style board I’ve done another space I’ve never shared before! I’ve put together a kids hangout room that would be great for a loft, basement, or even a playroom.

Kids Hangout Room.jpg


Boho Teen Bedroom

 
IMG_3977.JPG

For today’s post I’ve put together an affordable boho teen bedroom. I actually have never shared any teen spaces before, so this was a fun post to put together! I’ve kept the space fairly neutral, but have added in a lot of texture and some pops of green and blue for a bright and youthful look.

boho teen bedroom pinterest.jpg


Frames For Printable Artwork

 
IMG_2888.JPG

I’ve shared a lot of printable artwork lately, so for today’s post I’m sharing a big roundup of frames! I know some of you have said you struggle with finding vintage style frames, so I’ve made sure to include a lot of vintage looking options along with some more modern options as well.

To check out my favorite Etsy shops for printable artwork, click here.

Vintage Style Frames copy.jpg

1 // 2 // 3 // 4 // 5 // 6 // 7 // 8 // 9 // 10 // 11 // 12 // 13 // 14 // 15 // 16


Affordable Dining Table Roundup

 
IMG_3880.JPG

Today I’ve put together huge affordable dining table roundup! I think a dining table is a great place to save a bit to stay on budget, so you can invest in the more prominent pieces in the space like lighting and chairs. We’ve had the Bartol dining table from Pottery Barn for several years and we love it! It was a nice addition that completed the space and kept us on budget. For the most part, no matter what style chair you select, they typically end up covering most of the table, so I’d much rather spend more of the budget there to make sure they’re not only beautiful, but comfortable as well! Below I’ve rounded up some great dining table options that would work nicely with many design styles and keep your project on budget!

Affordable Dining Tables.jpg

Affordable Dining Tables 2.jpg


High/Low Design Board: California Eclectic

 
High End Dupes California Eclectic.jpg

Low:

High:


Bedroom Combos

 
IMG_3845.JPG

Today I’m sharing a few bedroom furniture and decor combinations that would make great starting points for a redesign. I love starting off a space with neutral pieces, as they make for a perfect base to bring in different colors, textures, and patterns to give the space personality.

Bedroom Combos Pinterest.jpg


Your Favorites This Week

 
Your Favorites this week 7-19 copy.jpg


Weekend Style: Budget Friendly Bathroom

 
IMG_3677.JPG

For today’s weekend style board I’ve done a budget friendly bathroom design. One of the hardest things about designing budget friendly spaces is making them feel custom, collected and unique. So for today’s design, I’ve sourced pieces that are affordable, but also have a more vintage or one of a kind look to them to keep the design from feeling basic.

Weekend Style Budget Friendly Bathroom Pinterest copy.jpg


This Week's Target Finds

 
This week's Target Finds copy.jpg


My Favorite Etsy Shops for Printable Artwork

 
7408AF6F-1B81-45D2-B5B5-30ECF93B454D.JPEG

A great way to keep your budget on track while also getting a custom sized piece is to use printable artwork. They’re extremely affordable, and with the right frame, can still keep your design looking high end. Etsy is my favorite place to look for printable artwork, and today I’m rounding up my top six shops along with a few of my picks from each!

Blue Jay Vintage Art


World Market Buy More Save More Sale + New Arrivals

 
170D0C35-07E9-4948-A392-DBA44755870F.JPEG

World Market is currently offering up to 25% off with their buy more, save more sale, and I’m sharing all of my picks! They also just launched a ton of new arrivals, so I’ve included many of those along with some longtime favorites.

WM New Arrivals and Sale.jpg


Budget Friendly Neutral Living Room

 
image.jpeg

Today I’m sharing a budget friendly living room design. I haven’t done an affordable full room design for a while, and I know a lot of you enjoy when I share boards like this, so I’m going to make an effort to share more affordable whole room designs in the future!


Weekend Style: Neutral Children's Bedroom

 
IMG_3426.JPEG

Today on the blog I’m sharing a neutral children’s bedroom design. I realize I haven’t shared a lot of designs geared towards children’s spaces lately, and I know many of you find this type of content helpful. More and more in recent years I’ve been getting requests for neutral children’s spaces, and I think it does really help the design last a bit longer, and can better transition into new phases of life.

Neutral Children's Bedroom Pinterest.jpg


My Serena & Lily Tent Sale Picks

 
6F80F17B-E53F-4AEA-BF15-47F30000CFEB.JPEG

The Serena and Lily tent sale is on, and there are so many beautiful pieces at great prices! Today on the blog, I’m rounding up a few of my top picks from the sale—which includes some items we have in our home that we love!

Serena and Lily Tent Sale Pinterest.jpg
 

DIY Vertical Shiplap Tutorial + How To Make Your DIY Projects Look More Professional

 
IMG_2721.JPG

I love the texture and dimension that shiplap adds to a space, and have added it to many rooms in our home over the past three years. Today, I’m sharing a tutorial of how I installed this vertical shiplap accent wall in our bedroom, along with my tips and tricks to make sure your diy projects have a more professional looking finished result. I am by no means a carpenter, but I can easily spot bad craftsmanship and finish work when I see it, and I feel that it actually takes away from the space and can unfortunately cheapen the overall look.

AADBA534-4135-440B-AEAC-01E9B05898D1.JPEG

In my opinion, the goal of diying something is to achieve a professional (or near professional) looking result that guests and potential future buyers in your home will not immediately assume was diyed by a non-professional. In each step of this tutorial, I’m going to share just a few simple tips on how to achieve better results for your projects, that make a huge difference in the finished product.

1F5E450C-B15A-4BC2-94CC-2944761136C2.JPEG

Materials you’ll need:

Shiplap

1/4” Plywood

Miter Saw

Table Saw

Jig Saw

Brad Nailer

Air Compressor

Stud Finder

Level

Wood Filler

Caulk

Installing vertical shiplap is slightly trickier than installing horizontal shiplap, because you’ll need to accommodate for the fact that many of your shiplap boards will need to be anchored to the wall between studs. Many people choose to use liquid nails and glue them to the wall, which is a perfectly fine solution. Since I was working with a very long wall I wanted to come up with a solution that was structurally sound, but would not destroy the drywall if anyone decided to remove the wall treatment in the future.

I decided to purchase a 4x8’ sheet of 1/4” plywood, and have the hardware store rip it down into 4” strips. That way, I could use them to create a structure behind the shiplap that was mounted to all of the studs and would minimize the damage to the wall. I will share more details and images of how I did this below.

Step 1:

I removed all the baseboards on the wall first. This is my first tip to a professional looking result! DO NOT leave on your baseboards or crown moulding and install your wall treatment over top, or try to miter the boards to tie them in. This never leads to a professional result, and is an immediate indicator that your project was not done by a professional. Always remove all baseboards and mouldings before installing a wall treatment. It is an easy (and free) additional step you can take that does not require any additional skills. After I removed all the mouldings, I used my stud finder to find where all the studs were, and used my level and a sharpie to make sure I marked them from the floor to ceiling.

IMG_8783.jpeg

Step 2:

This is where my 1/4” plywood structure comes into play. I made a plan in photoshop before heading to the hardware store to make sure I knew how much wood I needed, and what size strips I should have them ripped to. I figured out that one 4x8’ sheet of plywood ripped into 4” strips would provide enough materials to complete my structure. I also calculated how much shiplap I’d need for the project.

Another tip for professional looking shiplap—use products that are actual shiplap, or tongue and groove. Do not rip down plywood, as it is very prone to splintering on the edges, and has knots and texture in the finish of the wood, which will all lead to a very unprofessional looking paint job. I know it’s tempting to use these materials since they are very cost effective, but it’s not too much more to use higher quality materials like real shiplap, and they give you a significantly better finished product.

I attached the 1/4” plywood strips to the wall horizontally in four places so that I could nail the vertical shiplap boards over top and they would be secure enough to hang artwork on if I chose to do so. Every board would be anchored securely, and I was not damaging my drywall as much as if I were using liquid nails.

Step 3:

I then started attaching the vertical shiplap boards to my 1/4” plywood structure. I knew the cuts didn’t need to be exact since the baseboard would be covering up the bottom, so I cut them all at once and then installed them making sure I got the top of the board as flush to the ceiling as possible to minimize caulking later. Tip—make sure to place nail holes in spots on the boards that will be covered with baseboard or crown moulding wherever possible. This way you can minimize wood filling and reduce the amount of finish work you need to do, which will create less imperfections in the visible portions of the wall treatment.

Step 4:

Once you have all the vertical shiplap installed, reinstall the baseboard and crown (if applicable) and fill in all the nail holes, and caulk all the edges. Tip—make sure you do not skip this step! This is the key to a professional result. Gaps, cracks, and nails holes will detract from the wall treatment, and cheapen the overall look. The more seamlessly your new wall treatment blends into the wall, the more professional it makes the space look, and the more elevated it will make any furniture and decor you add appear. Make sure you caulk along top and bottom edges of the shiplap to seamlessly blend the ends of the boards into the ceiling (or crown moulding) and baseboard. I use a q tip or screwdriver to remove excess caulk from the grooves of the shiplap. This step is time consuming, but well worth it, and can make or break the project if you choose to skip it.

Tip—when cutting around outlets make sure to allow room for the outlet to be extended out flush with the new wall treatment. We like to use these outlet extenders to do so. DO NOT cut the shiplap around the existing outlet and cover and leave inset as the original depth of the wall. This is another opportunity to attract unwanted attention and leave your project looking unprofessional.

Step 5:

Sand all the wood filler, and paint the shiplap and mouldings in your desired color.

96B0840D-D906-44C9-B8F3-41D3A17999EB.JPEG

That’s it! Shiplap is one of the easiest diy projects I’ve completed, and can really transform your space to give you a more elevated look with a fairly low materials cost. I also hope the tips and tricks I shared help you to complete more professional looking projects in the future!

In case anyone is new around here, I’m going to add a before and after of our bedroom below so you can see where we started! This project was the perfect finishing touch to our space, and really helps pull some dimension into this all white space.

And here’s a before and after of the wall before I installed the shiplap last year, and how it looks today!

Sources:

DIY Vertical Shiplap Pinterest Image.jpg
 

Your Favorites This Week

 
image-1.JPG

I hope you all had a wonderful holiday! We had a nice time relaxing with my parents and spent a lot of the day finishing up a bathroom renovation we’ve been helping them with. I can’t wait to share with you all soon! Today I’ve rounded up some of your recent favorite items and will share them below!


Independence Day Sales

 
2A8BD6E3-20C5-4F7D-915B-83164D6C25DF.JPEG

I can’t believe that it’s almost the fourth of July! Without a lot of the things we’d normally be doing this time of year, the holiday really snuck up on me. I’m looking forward to an extra day to relax this weekend and some great sales to shop online! Today I’m rounding up all of my favorites along with a few of my picks. I hope you all have a nice holiday!

Serena & Lily — Special pricing on all outdoor items

Target — Save up to 25% off home items, women’s clothing starting at $5

Pottery Barn — Buy more save more, up to 25% off

Wayfair — Up to 70% off

Abercrombie — 40-60% off the entire store

McGee and Co — 20% off select lighting

Rejuvenation — 20% off everything

Madewell — Extra 30% off sale

West Elm — 20% off furniture, 25% off everything else

Anthropologie — Up to 70% off original prices

Lulu & Georgia — 20% off everything

Crate & Barrel — Up to 30% off sitewide

World Market — Up to 50% off storewide

Overstock — Up to 70% off 1000’s of items

American Eagle — Up to 60% off everything

Bloomist — $20 off $100 or more

Williams-Sonoma — 25% off your order

Wisteria — Going out of business sale, everything at least 50% off


Bed Styling Four Ways

 
CE431CBB-5FDD-41AE-82D8-E92A7161A9D9.JPEG

As you may have already noticed, beds are one of my favorite things to style, and is one of the few items I allow myself to collect! I love changing up the way my bed is styled seasonally, which sometimes doesn’t mean that you need to spend more money. Just changing the way a duvet or quilt is folded or situated on the bed makes a big difference and can provide a fresh new feel to your bedding.

Today, I’m sharing four ways to style your bed with simple tweaks here and there. You will notice that some items repeat throughout the looks, even though the looks themselves are quite different. I love doing a cohesive color palette throughout my whole home, because that way I can mix and match pillows and accessories between rooms to refresh my spaces without spending anything!

Bed Styling Four Ways.jpg

Textural

For the textural look I’ve brought in a collection of different sized pillows onto the bed to create a more inviting feel. The pillows I’ve chosen are also more casual in style, and have a lot of fringe and woven details to them, which I always find make a space feel warm and inviting. Texture is an important element not to overlook when designing very neutral spaces, as it provides more depth and character to the design. I’ve finished out the styling with a woven linen throw at the foot of the bed over the folded duvet, and a faux concrete table lamp to keep the touches of gray evenly dispersed throughout the space.

CE431CBB-5FDD-41AE-82D8-E92A7161A9D9.JPEG

Minimal

I’ve paired things down in the minimal look, sticking to three decorative pillows and keeping only the duvet folded at the foot of the bed. I’ve kept the nightstand to mostly functional pieces, with two coffee table books and decorative beads in the open shelf to add a bit of personality. There’s just enough in this vignette to make the bed feel inviting but not overdone.

AADBA534-4135-440B-AEAC-01E9B05898D1.JPEG

Layered

To create a layered look, I’ve added in five pillows to the bed, pulling in more texture, pattern, and color. I’ve brought in some additional decor to the nightstand, and have added in an oversized linen throw to the foot of the bed.

1F5E450C-B15A-4BC2-94CC-2944761136C2.JPEG

Monochromatic

For the final look, I’ve done a monochromatic look that creates a light and airy feel for the space. Since there isn’t much color here, I’ve made sure the pillows have some texture to them. The plaid pillows are a very substantial wool that have a soft and fuzzy feel, and the lumbar pillow has the gray embroidered detail that draws the eye to the center of the bed, making these two patterns the focal point. I’ve added in the brass lamp for a warm and polished touch, and made sure all of the white linens on the bed had plenty of texture to keep the space feeling inviting and not sterile.

IMG_3133.JPG

A couple weeks ago I shared a dresser styling post on instagram that is a nice compliment to these bed styling techniques. I will be sharing a full post on the details of how I style a dresser soon!

Dresser Styling Four Ways copy.jpg
 

Accent Tables Under $300

 
image.JPG

It’s been a while since I’ve done a fresh roundup of affordable accent tables, and since this is such a key item in many spaces in a home I’m sharing a ton of new options today! I’ve kept the list to light neutrals with some subtle textures and warmth that are great for a large range of design styles.

BB Affordable Accent Tables Under 300 916 copy.jpg