
DIY Vertical Shiplap Tutorial + How To Make Your DIY Projects Look More Professional

I love the texture and dimension that shiplap adds to a space, and have added it to many rooms in our home over the past three years. Today, I’m sharing a tutorial of how I installed this vertical shiplap accent wall in our bedroom, along with my tips and tricks to make sure your diy projects have a more professional looking finished result. I am by no means a carpenter, but I can easily spot bad craftsmanship and finish work when I see it, and I feel that it actually takes away from the space and can unfortunately cheapen the overall look.

In my opinion, the goal of diying something is to achieve a professional (or near professional) looking result that guests and potential future buyers in your home will not immediately assume was diyed by a non-professional. In each step of this tutorial, I’m going to share just a few simple tips on how to achieve better results for your projects, that make a huge difference in the finished product.

Materials you’ll need:
Installing vertical shiplap is slightly trickier than installing horizontal shiplap, because you’ll need to accommodate for the fact that many of your shiplap boards will need to be anchored to the wall between studs. Many people choose to use liquid nails and glue them to the wall, which is a perfectly fine solution. Since I was working with a very long wall I wanted to come up with a solution that was structurally sound, but would not destroy the drywall if anyone decided to remove the wall treatment in the future.
I decided to purchase a 4x8’ sheet of 1/4” plywood, and have the hardware store rip it down into 4” strips. That way, I could use them to create a structure behind the shiplap that was mounted to all of the studs and would minimize the damage to the wall. I will share more details and images of how I did this below.
Step 1:
I removed all the baseboards on the wall first. This is my first tip to a professional looking result! DO NOT leave on your baseboards or crown moulding and install your wall treatment over top, or try to miter the boards to tie them in. This never leads to a professional result, and is an immediate indicator that your project was not done by a professional. Always remove all baseboards and mouldings before installing a wall treatment. It is an easy (and free) additional step you can take that does not require any additional skills. After I removed all the mouldings, I used my stud finder to find where all the studs were, and used my level and a sharpie to make sure I marked them from the floor to ceiling.

Step 2:
This is where my 1/4” plywood structure comes into play. I made a plan in photoshop before heading to the hardware store to make sure I knew how much wood I needed, and what size strips I should have them ripped to. I figured out that one 4x8’ sheet of plywood ripped into 4” strips would provide enough materials to complete my structure. I also calculated how much shiplap I’d need for the project.
Another tip for professional looking shiplap—use products that are actual shiplap, or tongue and groove. Do not rip down plywood, as it is very prone to splintering on the edges, and has knots and texture in the finish of the wood, which will all lead to a very unprofessional looking paint job. I know it’s tempting to use these materials since they are very cost effective, but it’s not too much more to use higher quality materials like real shiplap, and they give you a significantly better finished product.

I attached the 1/4” plywood strips to the wall horizontally in four places so that I could nail the vertical shiplap boards over top and they would be secure enough to hang artwork on if I chose to do so. Every board would be anchored securely, and I was not damaging my drywall as much as if I were using liquid nails.

Step 3:
I then started attaching the vertical shiplap boards to my 1/4” plywood structure. I knew the cuts didn’t need to be exact since the baseboard would be covering up the bottom, so I cut them all at once and then installed them making sure I got the top of the board as flush to the ceiling as possible to minimize caulking later. Tip—make sure to place nail holes in spots on the boards that will be covered with baseboard or crown moulding wherever possible. This way you can minimize wood filling and reduce the amount of finish work you need to do, which will create less imperfections in the visible portions of the wall treatment.

Step 4:
Once you have all the vertical shiplap installed, reinstall the baseboard and crown (if applicable) and fill in all the nail holes, and caulk all the edges. Tip—make sure you do not skip this step! This is the key to a professional result. Gaps, cracks, and nails holes will detract from the wall treatment, and cheapen the overall look. The more seamlessly your new wall treatment blends into the wall, the more professional it makes the space look, and the more elevated it will make any furniture and decor you add appear. Make sure you caulk along top and bottom edges of the shiplap to seamlessly blend the ends of the boards into the ceiling (or crown moulding) and baseboard. I use a q tip or screwdriver to remove excess caulk from the grooves of the shiplap. This step is time consuming, but well worth it, and can make or break the project if you choose to skip it.

Tip—when cutting around outlets make sure to allow room for the outlet to be extended out flush with the new wall treatment. We like to use these outlet extenders to do so. DO NOT cut the shiplap around the existing outlet and cover and leave inset as the original depth of the wall. This is another opportunity to attract unwanted attention and leave your project looking unprofessional.
Step 5:
Sand all the wood filler, and paint the shiplap and mouldings in your desired color.

That’s it! Shiplap is one of the easiest diy projects I’ve completed, and can really transform your space to give you a more elevated look with a fairly low materials cost. I also hope the tips and tricks I shared help you to complete more professional looking projects in the future!
In case anyone is new around here, I’m going to add a before and after of our bedroom below so you can see where we started! This project was the perfect finishing touch to our space, and really helps pull some dimension into this all white space.
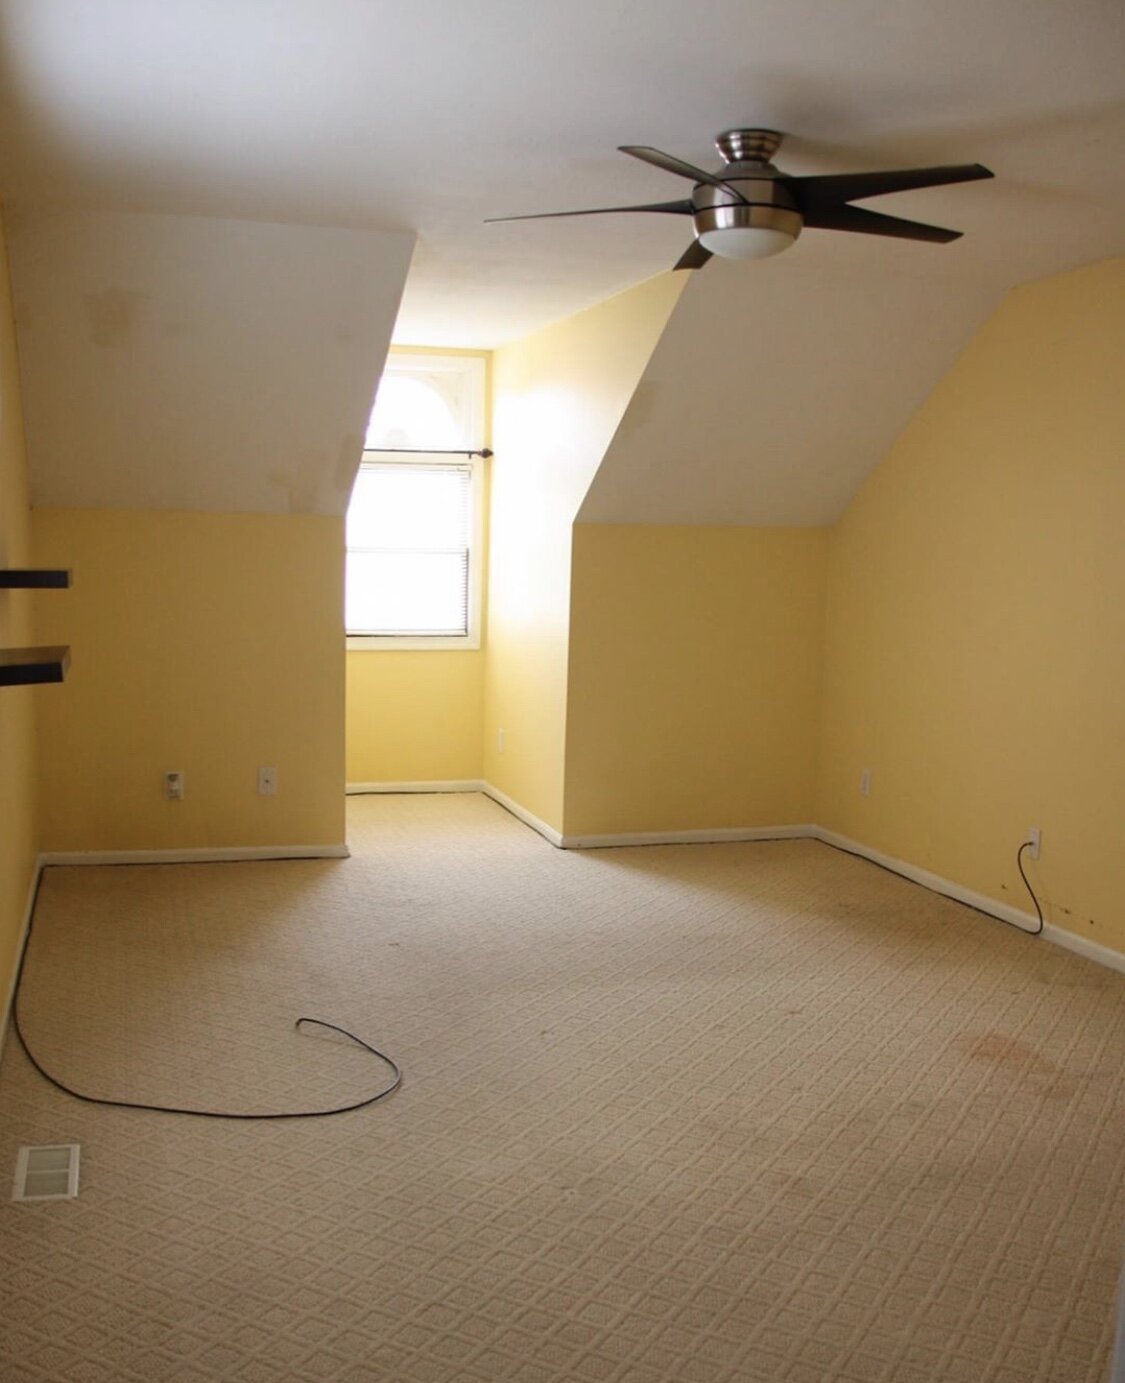
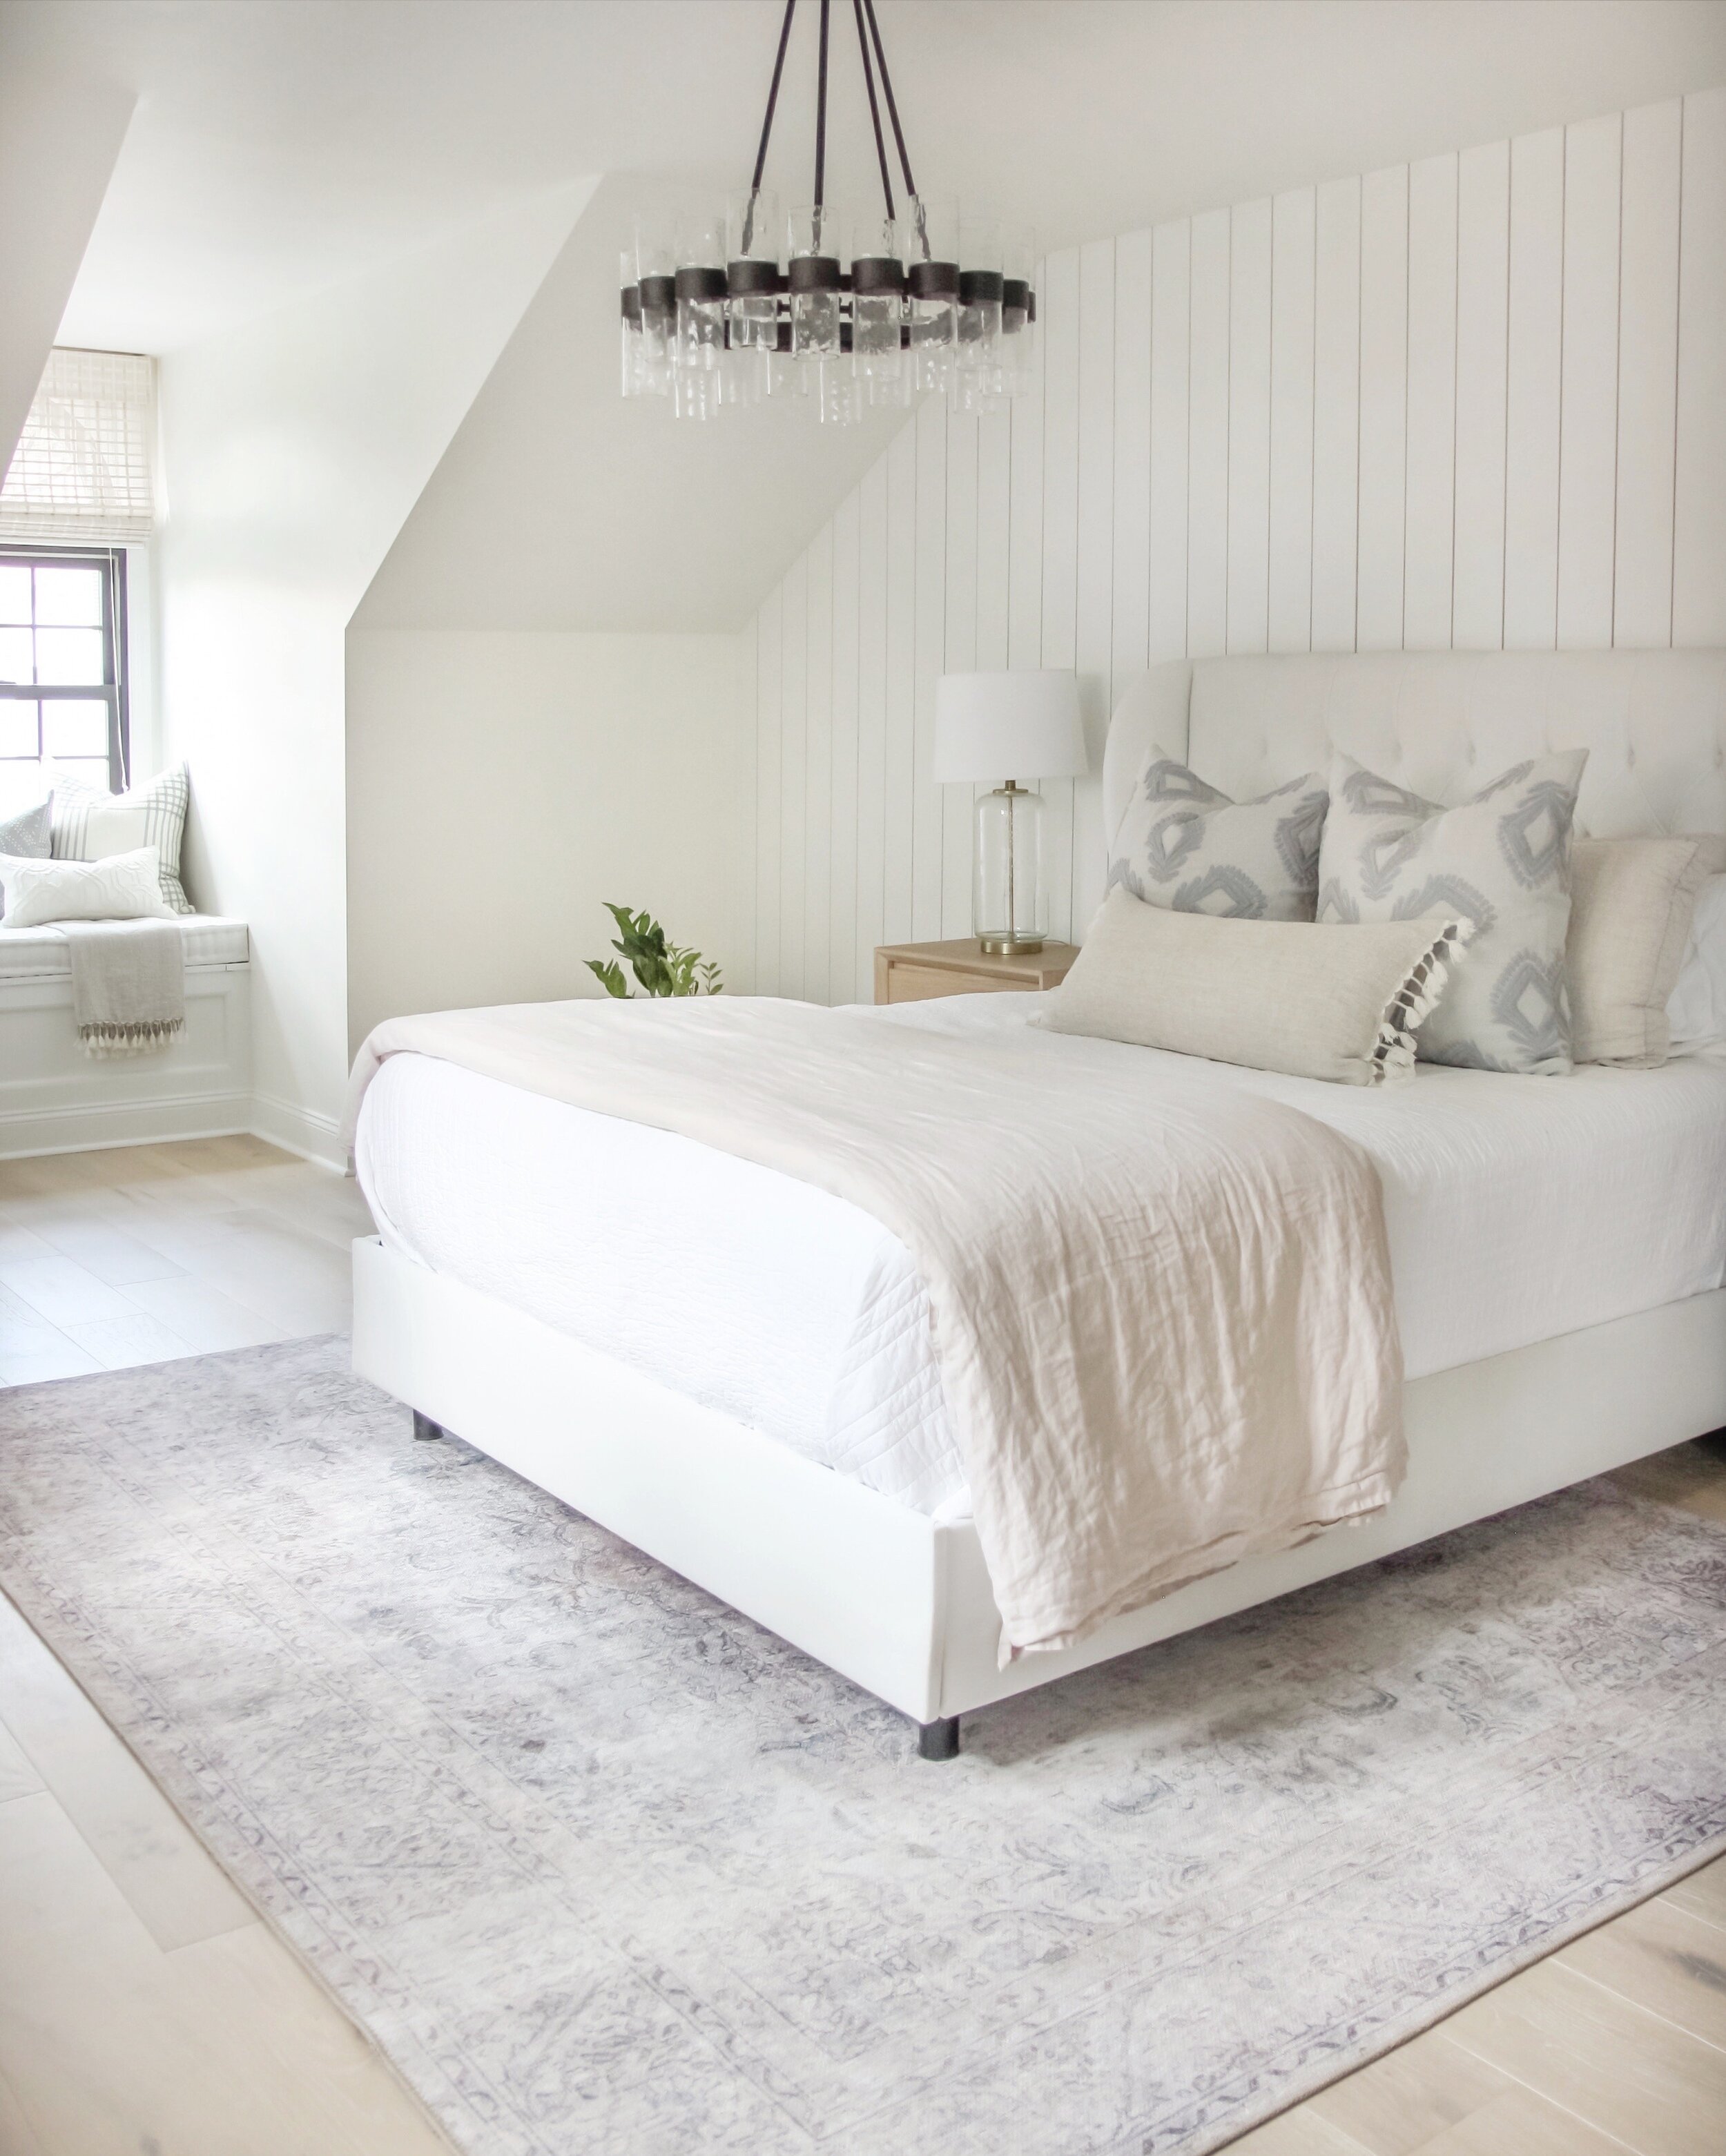
And here’s a before and after of the wall before I installed the shiplap last year, and how it looks today!


Sources:

